Approve/godkänna an invoice
How to approve an invoice.
Introduction for processing invoices in the new UBW M7
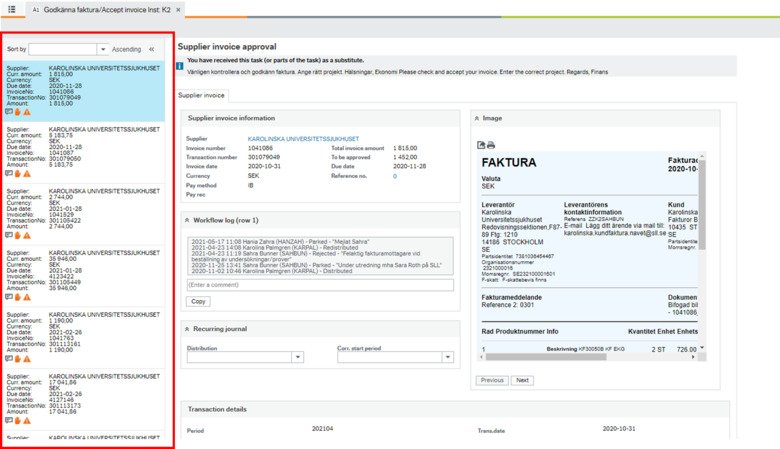
Mark an invoice that you wish to process in the list to the left in UBW web.
1. Before accepting an invoice
- Check that you have received the goods or services ordered
- Check that the price for the goods/supplies is correct
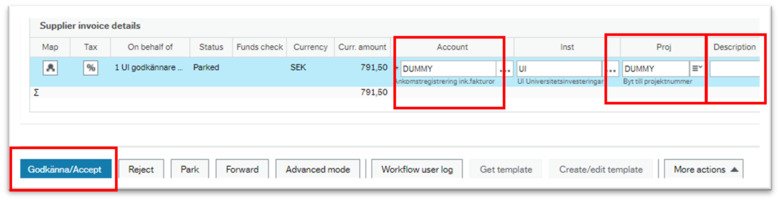
- Type in account number (see the accounting plan for assistance) and project number
- Write complementary verification text, purpose of the invoice
- Attach documents if necessary (receipts, participation lists, program)
- If necessary for example, you can send the invoice to another person for approval or reject it if it not billed to KI
1a. In normal mode
- In normal mode, you can approve, forward, and reject an entire invoice. If the actions refer to parts of the invoice, you need to switch to advanced mode.
- Fill in the invoice with account and project number and fill in the description. If you don't know which account to use, look in the chart of accounts or search the box and suggestions will come up. You always need to put in a project number.
- In the description field, fill in supplementary explanatory text associated with the purchase. This text is included in the UBW report and appears, for example, in the Research Web. You control what level of ambition the text should have based on your needs when follow-up.
- Tap Approve/Accept.
- Don't forget to tab out of the field you changed to effect the change.
How do I change institution code with multiple institutional eligibility
User X is affiliated with two different institutions, the institutions A1 and Ö2. User X receives an invoice with their ZZ(A1) reference, which means that the invoice ends up in institution A1. User X wants the payment to go to institution Ö2.
Do not reject the invoice to ask us to change the institution. Instead, select account and the preferred project with institution Ö2, then approve. The project controls departmental competences and in the final bookkeeping it changes from A1 to Ö2.
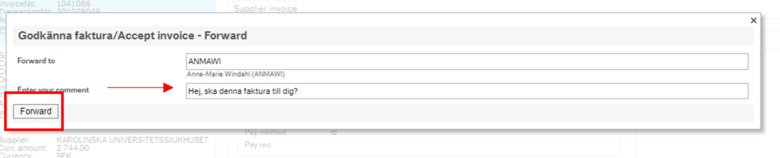
Forward an invoice
Should the entire invoice be sent to another user, forward the invoice (do not reject). Leave DUMMY and institution code. The institution designation changes when the intended approver specifies his project.

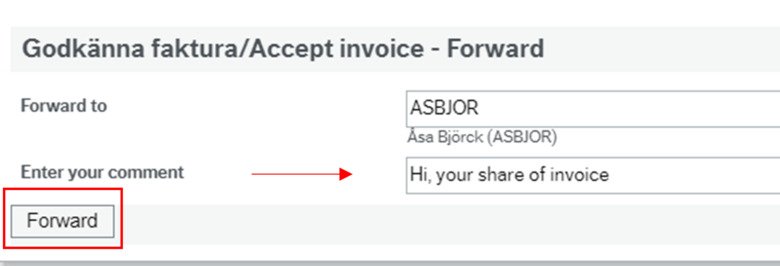
Select the person you´ll forward to in the drop-down list, the options appear when you enter the name or personal KI-ID.
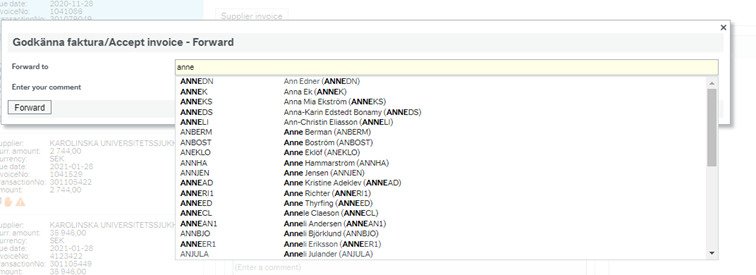
Comment is required. Then press the Forward button.
Reject an invoice
You should only reject an invoice that is incorrect, i.e. an invoice that is not addressed to Karolinska Institute. In case of other errors, such as not delivered, damaged goods i.e. contact the supplier and request a credit note (more information below).
Should the invoice belong to another user, forward the invoice instead of rejecting it.
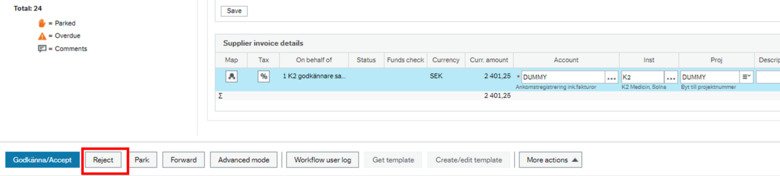
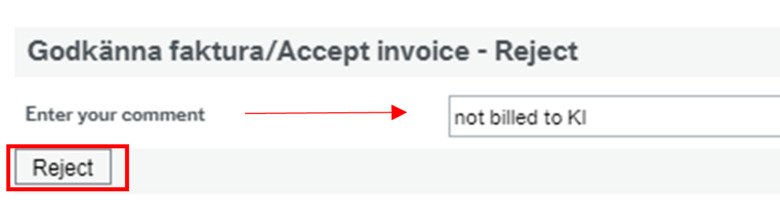
The below box pops up, comment required, end with Reject.
Request a credit note for an incorrect invoice?
If you receive an invoice that does not match your order, you should contact the supplier and request a credit. Park the invoice and enter the comment. When credit arrives, approve debit invoice and credit invoice with the same account and project number at the same time.
Enter comments on both invoices so that economists can connect both invoices. For example, on the debit invoice, you can type: Belongs to credit with the number 123456. On the credit note, type: Belongs to the debit with the number 78910.
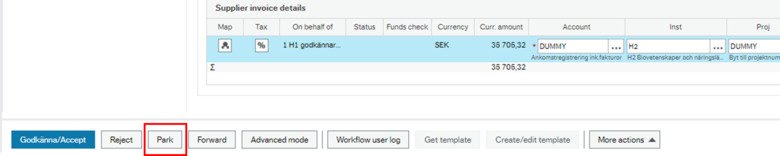
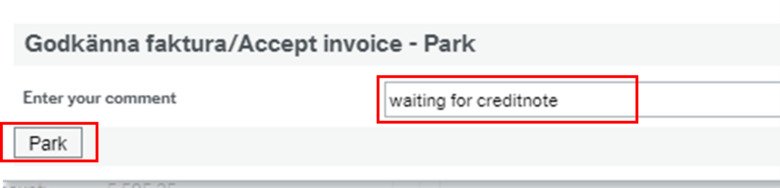
Park an invoice
Park an invoice by pressing the Park button, enter comment with reason for parking, press Park again to finish.
Workflow log
Always read any comments that are under the Workflow Log section. In the field under Workflow Log, you can enter a comment that is displayed to subsequent users in the feed.

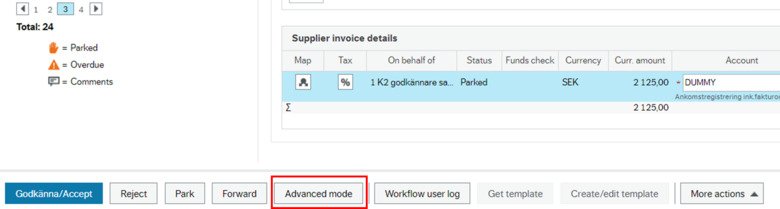
1b. In advanced mode
Use advanced mode if you want to:
- forward part of an invoice to another user
- Code the invoice per amount and projects numbers
Switch to advanced mode by button To advanced mode.
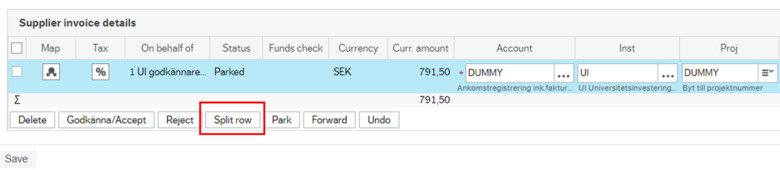
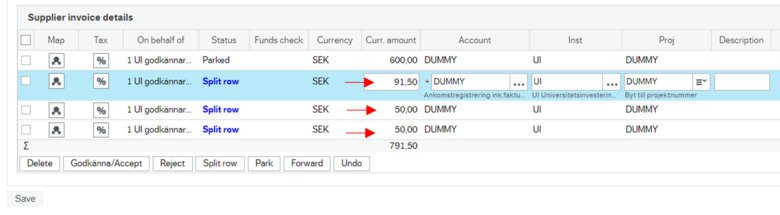
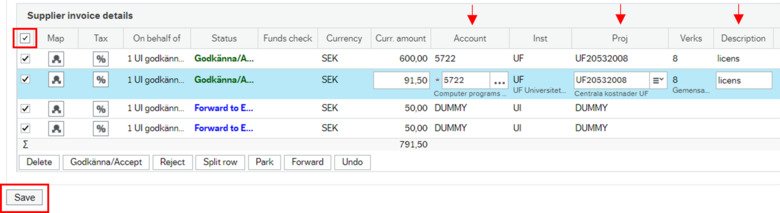
Split cost per user/institution and/or project number
To split the cost on multiple rows press Split row. Repeat if needed.
For splitting cost per account and/or project number, state amount per row and code per usual with account and project number. Check upper left small box to select all rows, press Accept, and finish with pressing Save
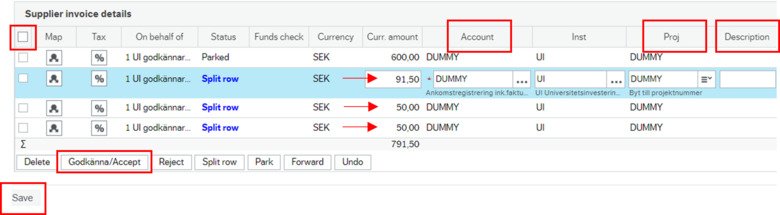
Note! Do not forget to tab forward from the changed field to apply the change.
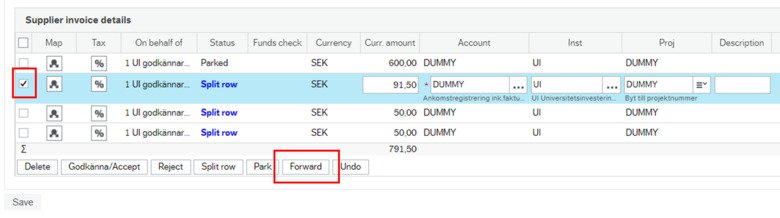
When forwarding part of the cost to another user. Start by dividing rows as previously described. Enter the correct amount per row.
Select the row you want to forward by checking the small left box on the specified row and press Forward. NOTE, do not change the coding, leave DUMMY and institution code. The institution designation changes when the intended approver specifies their project.
Then you can write a comment to the person who you are forwarding too.
Select all rows by checking the top left box, finish by pressing Save.
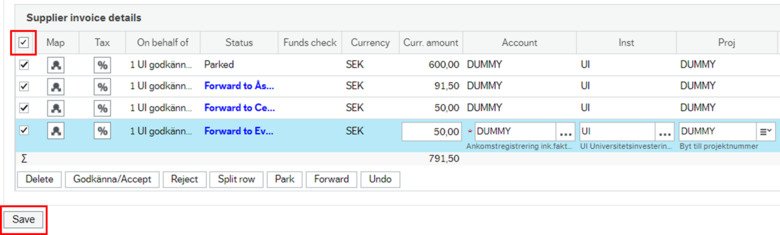
In this mode, you can also accept your own rows and forward other rows at the same time. Your own rows must then be coded per usual. Select only your own row and press Godkänna / Accept. Select each row to be forwarded individually according to the instructions above. Then select all rows by ticking the top box, finish by pressing Save. (All rows need an applied action).
NOTE !!! You are only authorized for your own institution, so you can not approve for other institutions for which you are not authorized. I.e. you should not change account or project but leave DUMMY. If you fill in a projectnumber for an institution for which you are not authorized, you will receive an error message and will not be able to forward the row. The institution designation changes when the intended approver specifies their project.
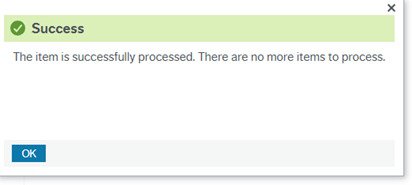
After you save, a message appears stating that your action has been processed.
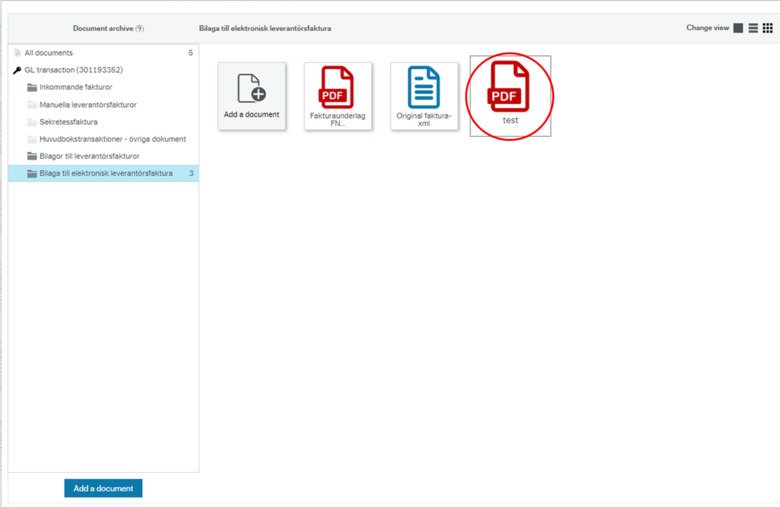
Attach a document to an invoice
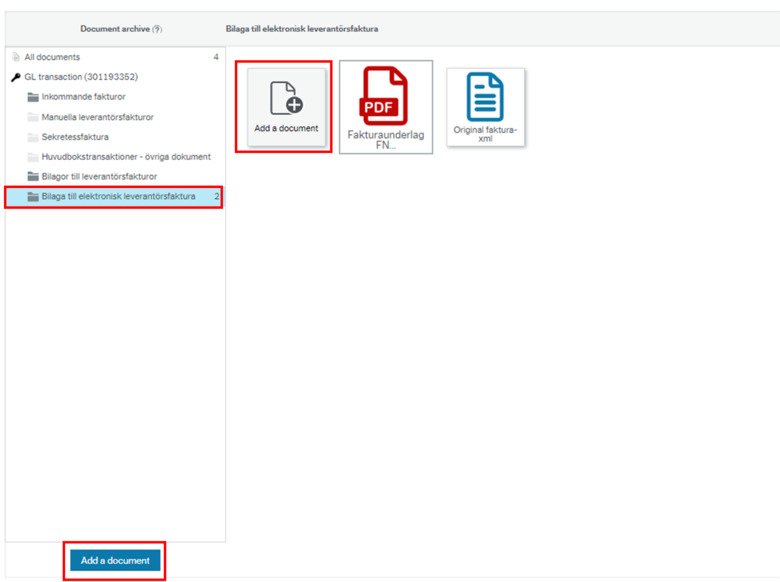
Remember to always attach the necessary documents to the invoice. It is mandatory for, for example, representation. To attach your documents to the invoice, click on Clip at the top right of the window. You see the clip that is framed in the picture below.

You can now attach documents by clicking on Add document or by "drag & drop" to the area marked with the arrow below. Start by selecting Appendix to electronic supplier invoice
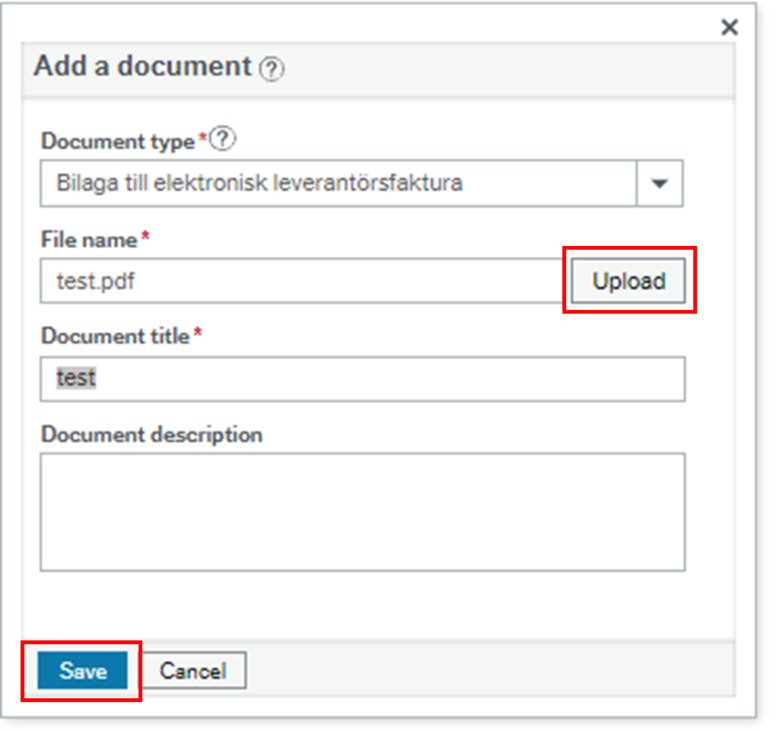
If you select Add document, the window below will appear. Press Upload, attach, exit by pressing Save. File name and document title are filled in automatically according to file name after you attach
If you choose to use "drag & drop", start by selecting Appendix to electronic supplier invoice. Drag the file to the area and the above box will pop up automatically. You finish by pressing Save. File name and document title are filled in automatically according to file name also in this case.
Now you see the attachments, press the top right cross to get back to the invoice. (If you added the wrong document, right-click on the document and select "delete".)