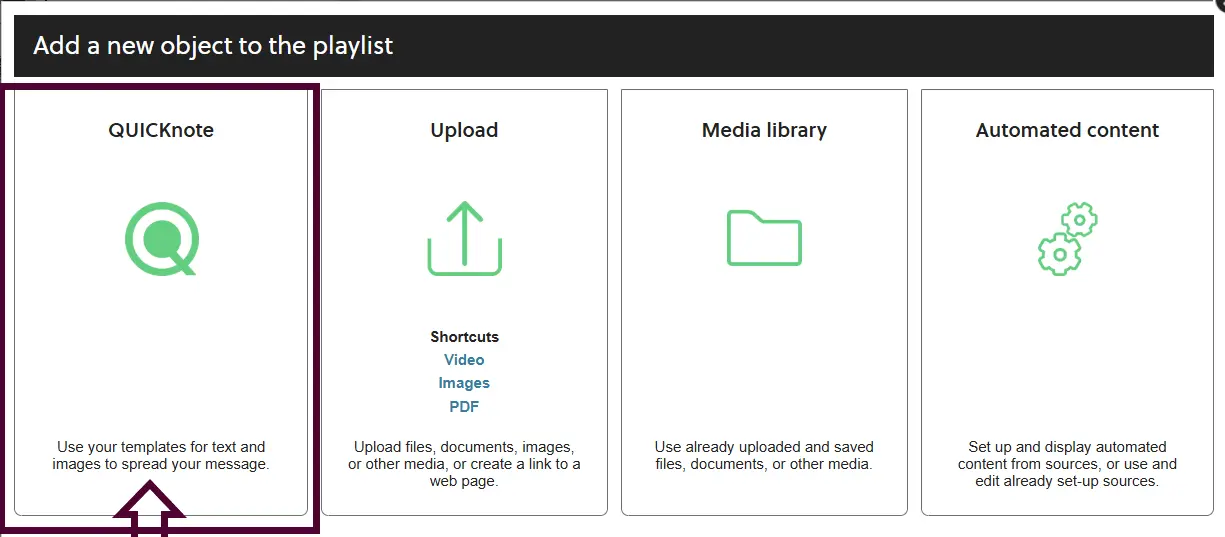
Create adverts for digital screens with KI's templates
In order to create a more uniform and professional expression across the campus (Flemingsberg and Solna), KI has developed new templates for the digital screens. All adverts must be made in KI's templates for digital screens so that they comply with KI's rules on branding and graphic profile as well as the accessibility requirements we are obliged to relate to. There are two different types of templates that you can use to publish on the screens.
Templates in PowerPoint
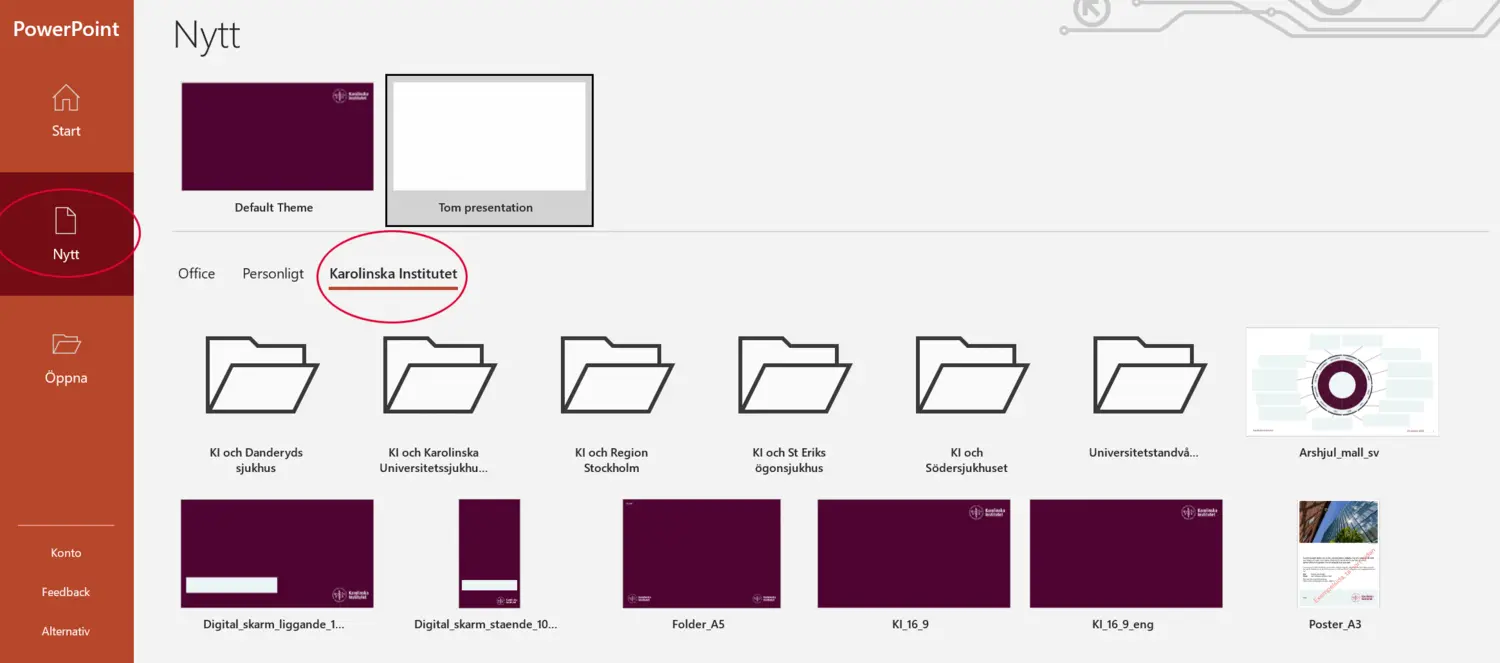
You will find the templates directly in PowerPoint if you are working on a KI computer.
- Open PowerPoint
- Select 'New'
- Click on 'Karolinska Institutet'
- Double-click on the template you want to use "Digital skärm_stående" (digital screen portrait) or "Digital_skärm_liggande" (digital screen landscape).
- Then choose the image layout that best suits your advert (with or without image, collaboration template, etc.).
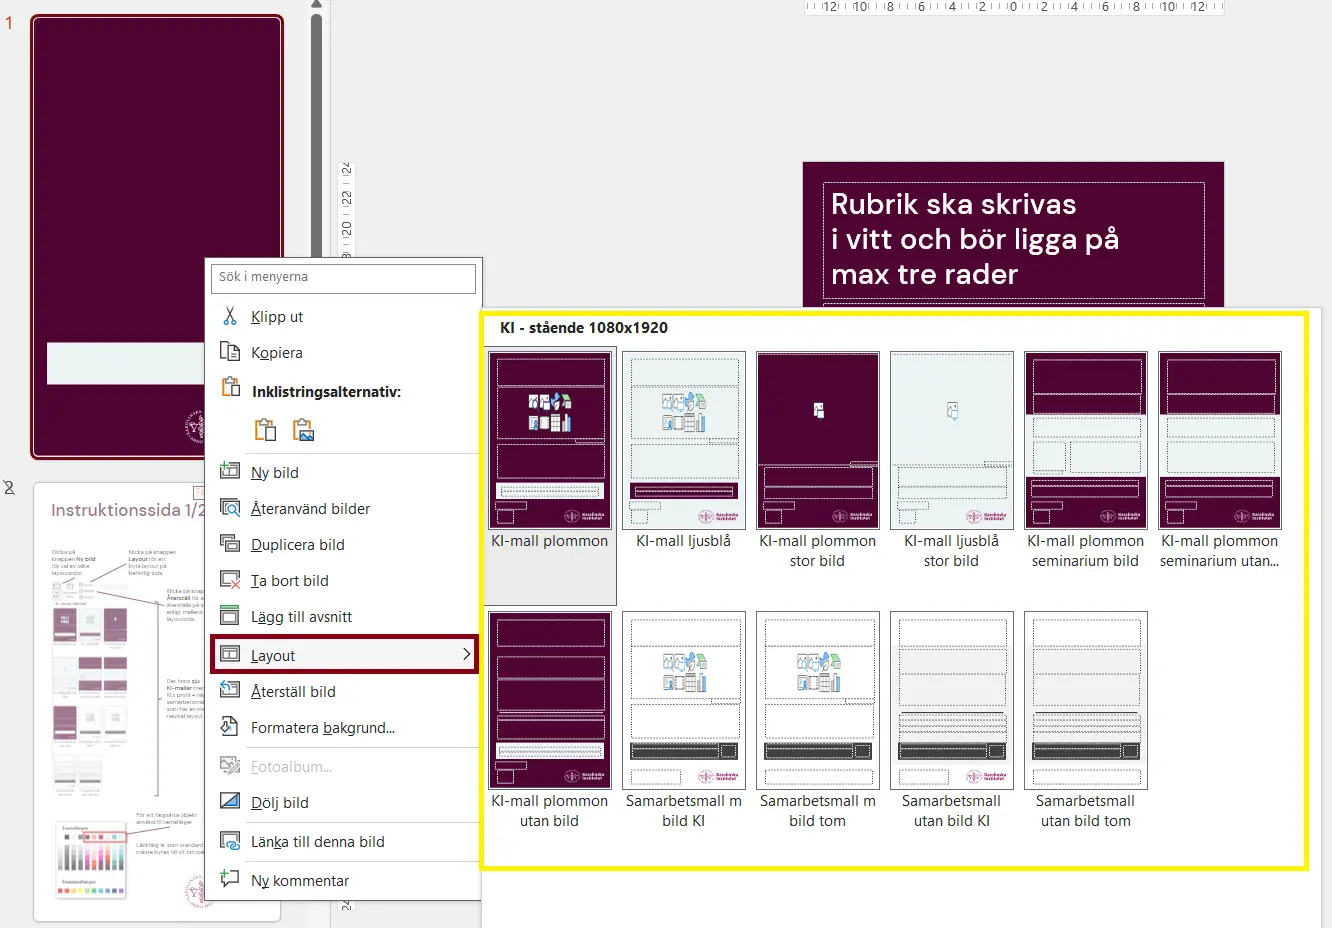
- Follow the instructions and create your advert. You can delete the instruction pages when you have finished designing your advert.
- Save the advert as JPEG, PNG or PDF.
Quicknote templates directly in PLAYipp
There are ready-made Quicknote templates directly in the PLAYipp publishing tool for both landscape and portrait screens. The templates are called "NY Stående helskärm" (NEW Full Screen Portrait) and "NY Liggande helskärm" (NEW Full Screen Landscape).
- Log in to PLAYipp and select the screen you want to publish your advert on.
- Select New image
- When you are in the publishing mode, you will find the Quicknote templates under the left pane.
There are eight Quicknote templates, six KI templates and two collaboration templates.
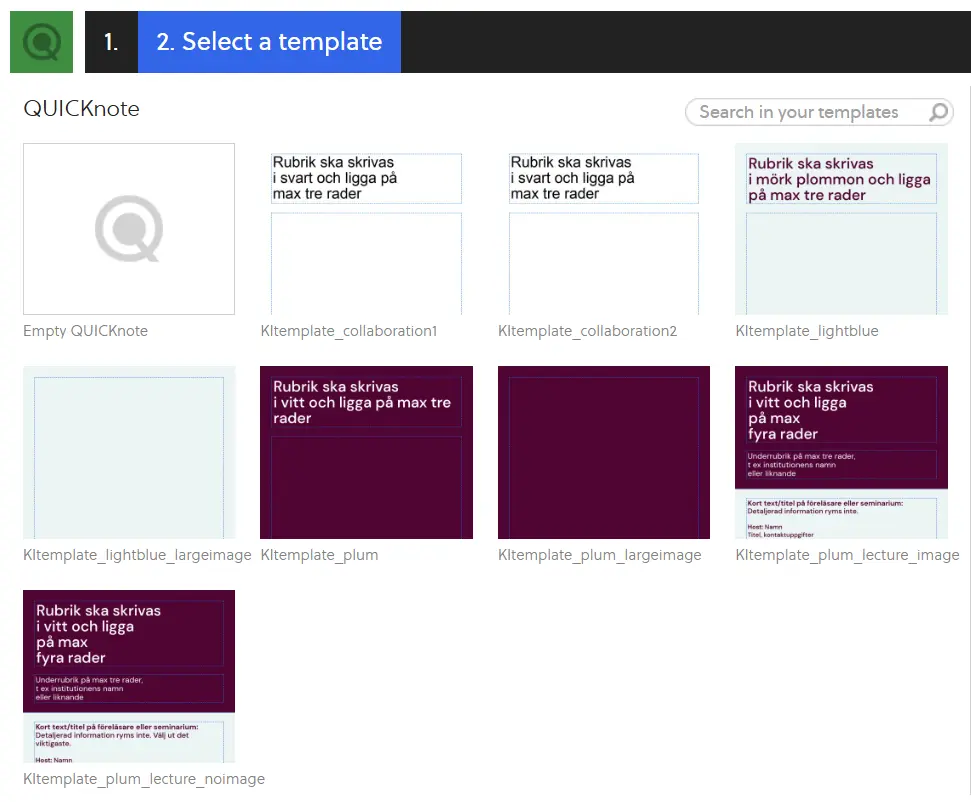
- Then choose the image layout that best suits your advert (with or without image, collaboration template, etc.).
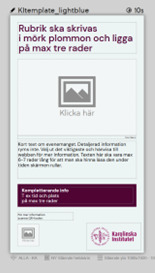
- Fill in the headline and other text, uploead an image or QR code, if necessary.
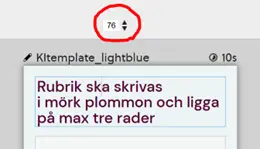
In some of the fields you can change the size of the text, and also, if you wish to have certain words in bold, for example. Otherwise, the template is relatively locked and has a certain number of characters that fit within each field/box.
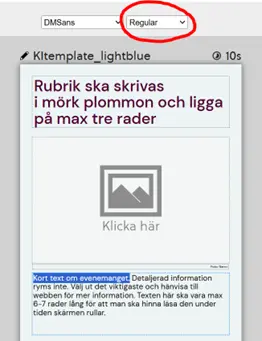
Try to keep it content as short as possible. Instead, put detailed information on a web page you can link to via QR code or short URL. By default, the screen is set to display for 10 seconds.
Publish and schedule your advert as usual.
Scheduling
Whether you have chosen to create your advert in PowerPoint or directly in PLAYipp using Quicknote, you first need to choose which screen or screen group it will be published on.
- Select screen or screen group in the list of screen groups or screen locations (left column)
- Select the screen layout NY Stående helskärm (NEW Full screen portrait) or NY Liggande helskärm (NEW Full screen landscape)
- Select ‘+ Add’ (top right)
- Create a new template in QUICKnote, or choose to upload the advert you created in PowerPoint and saved as JPEG, PNG or PDF.
- If you choose to upload a file from your computer, you need to select the playtime and save the file in the correct PLAYipp folder.
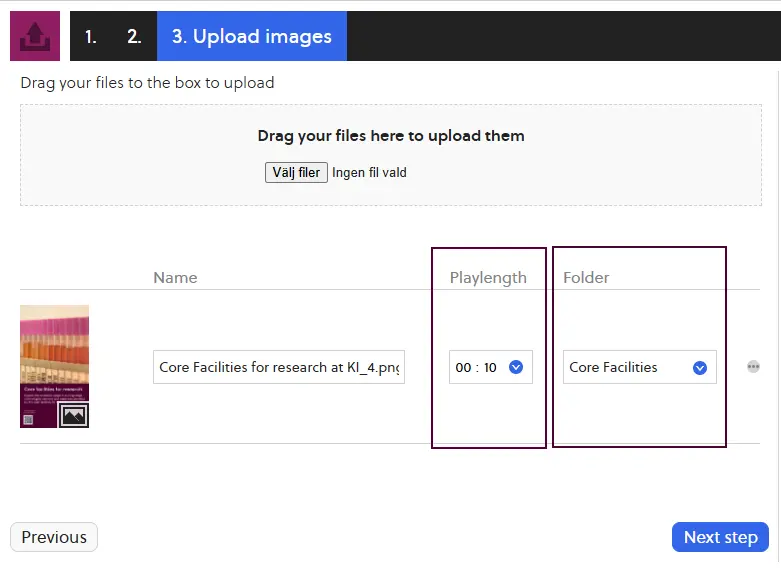
- Select ‘next steps’
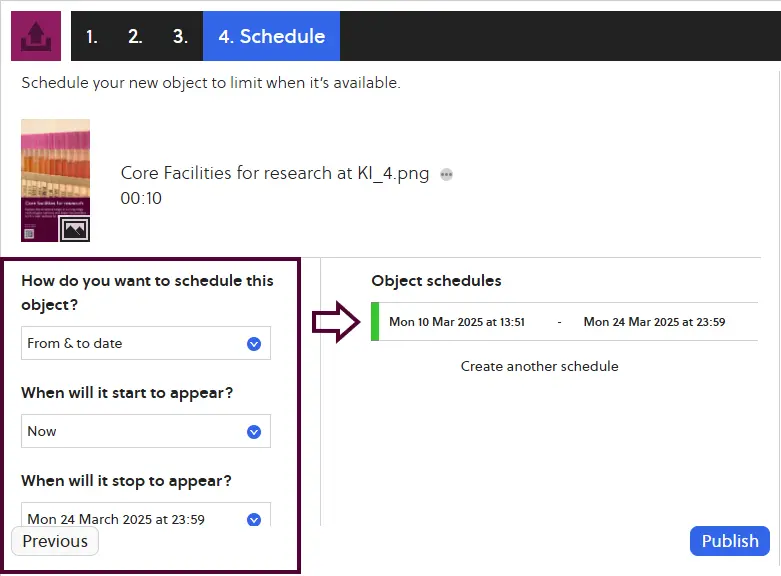
- Click on the calendar and then go to schedule your advert
- Select publish
Your advert will now appear in the playlist of the screen you have chosen to publish on.
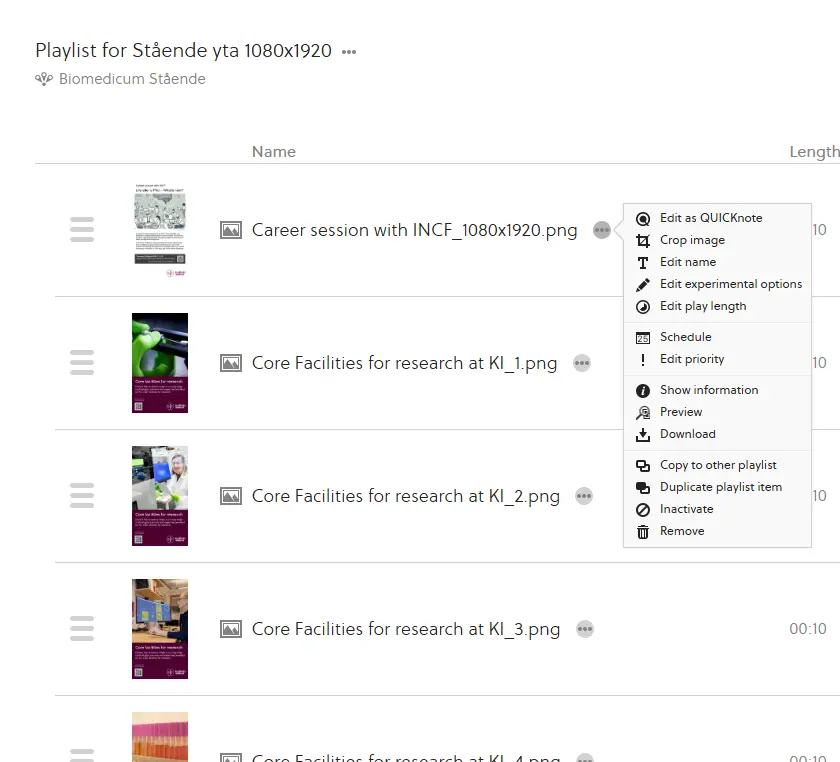
You can make a range of adjustments or changes by clicking on the three dots next to your advert title. For example, you can change the scheduling, change the name, preview, or copy the scheduling of the advert to another playlist/screen/cut group, for example.
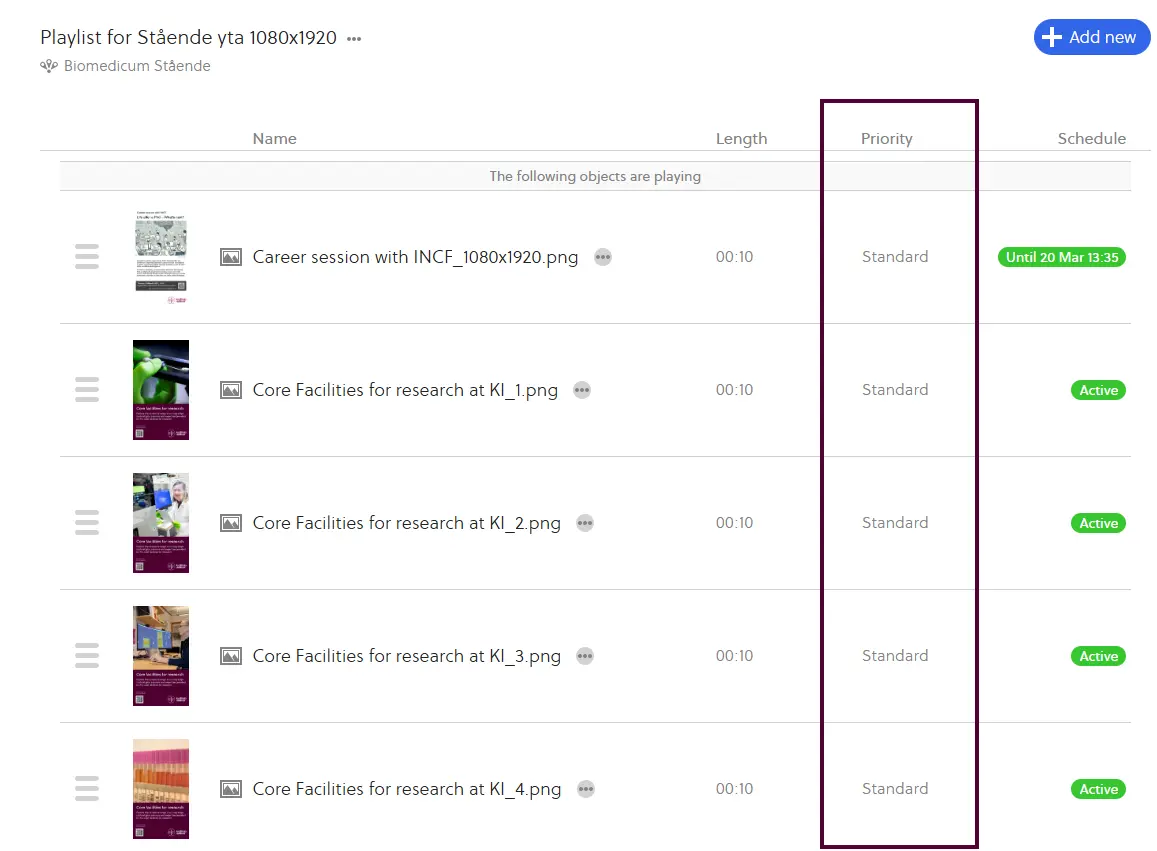
Priority
NOTE: never change the priority, it should always be set to ‘Standard’. If you change the priority to anything other than Standard, all other images in the playlist will be hidden.
The only exception when priority may be changed is if the advert relates to an event and is displayed on a screen adjacent to the premises where the event is taking place. In this case, you can choose to display only information relating to the event on that particular screen.
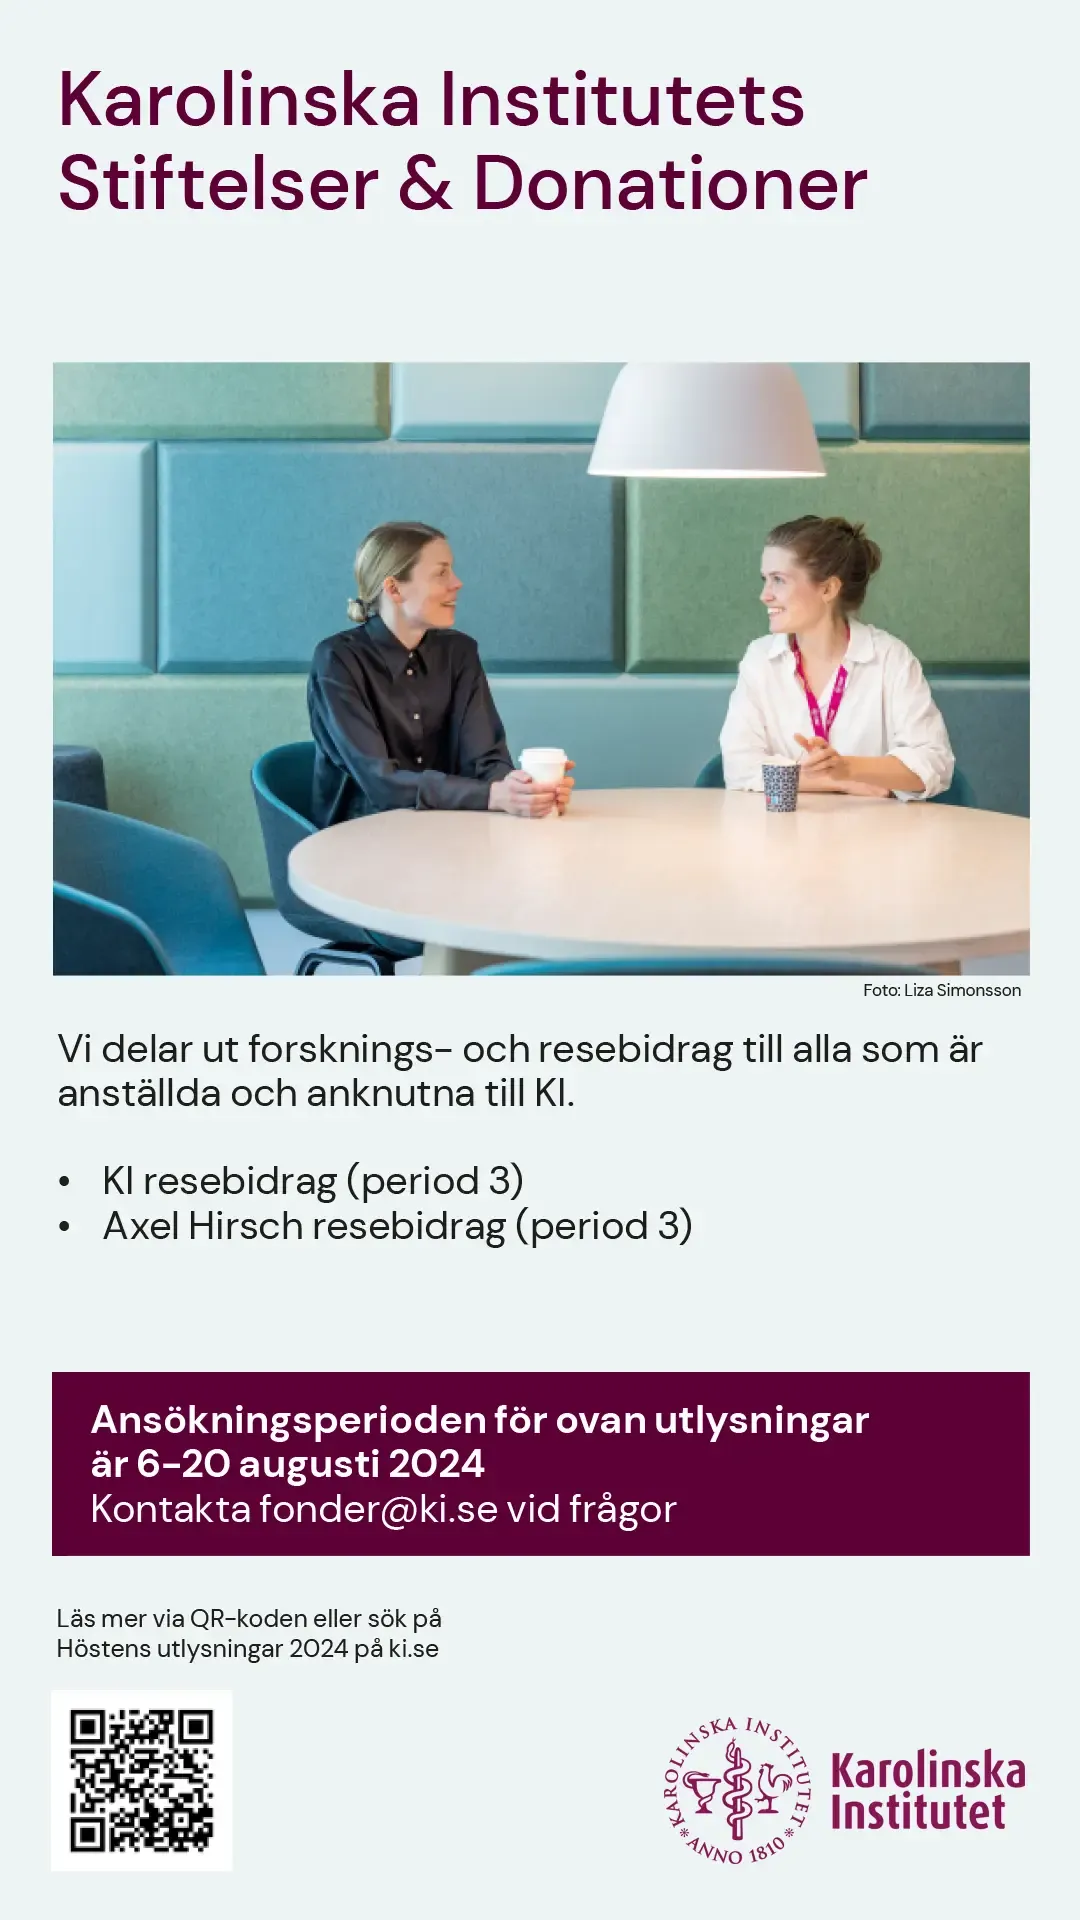
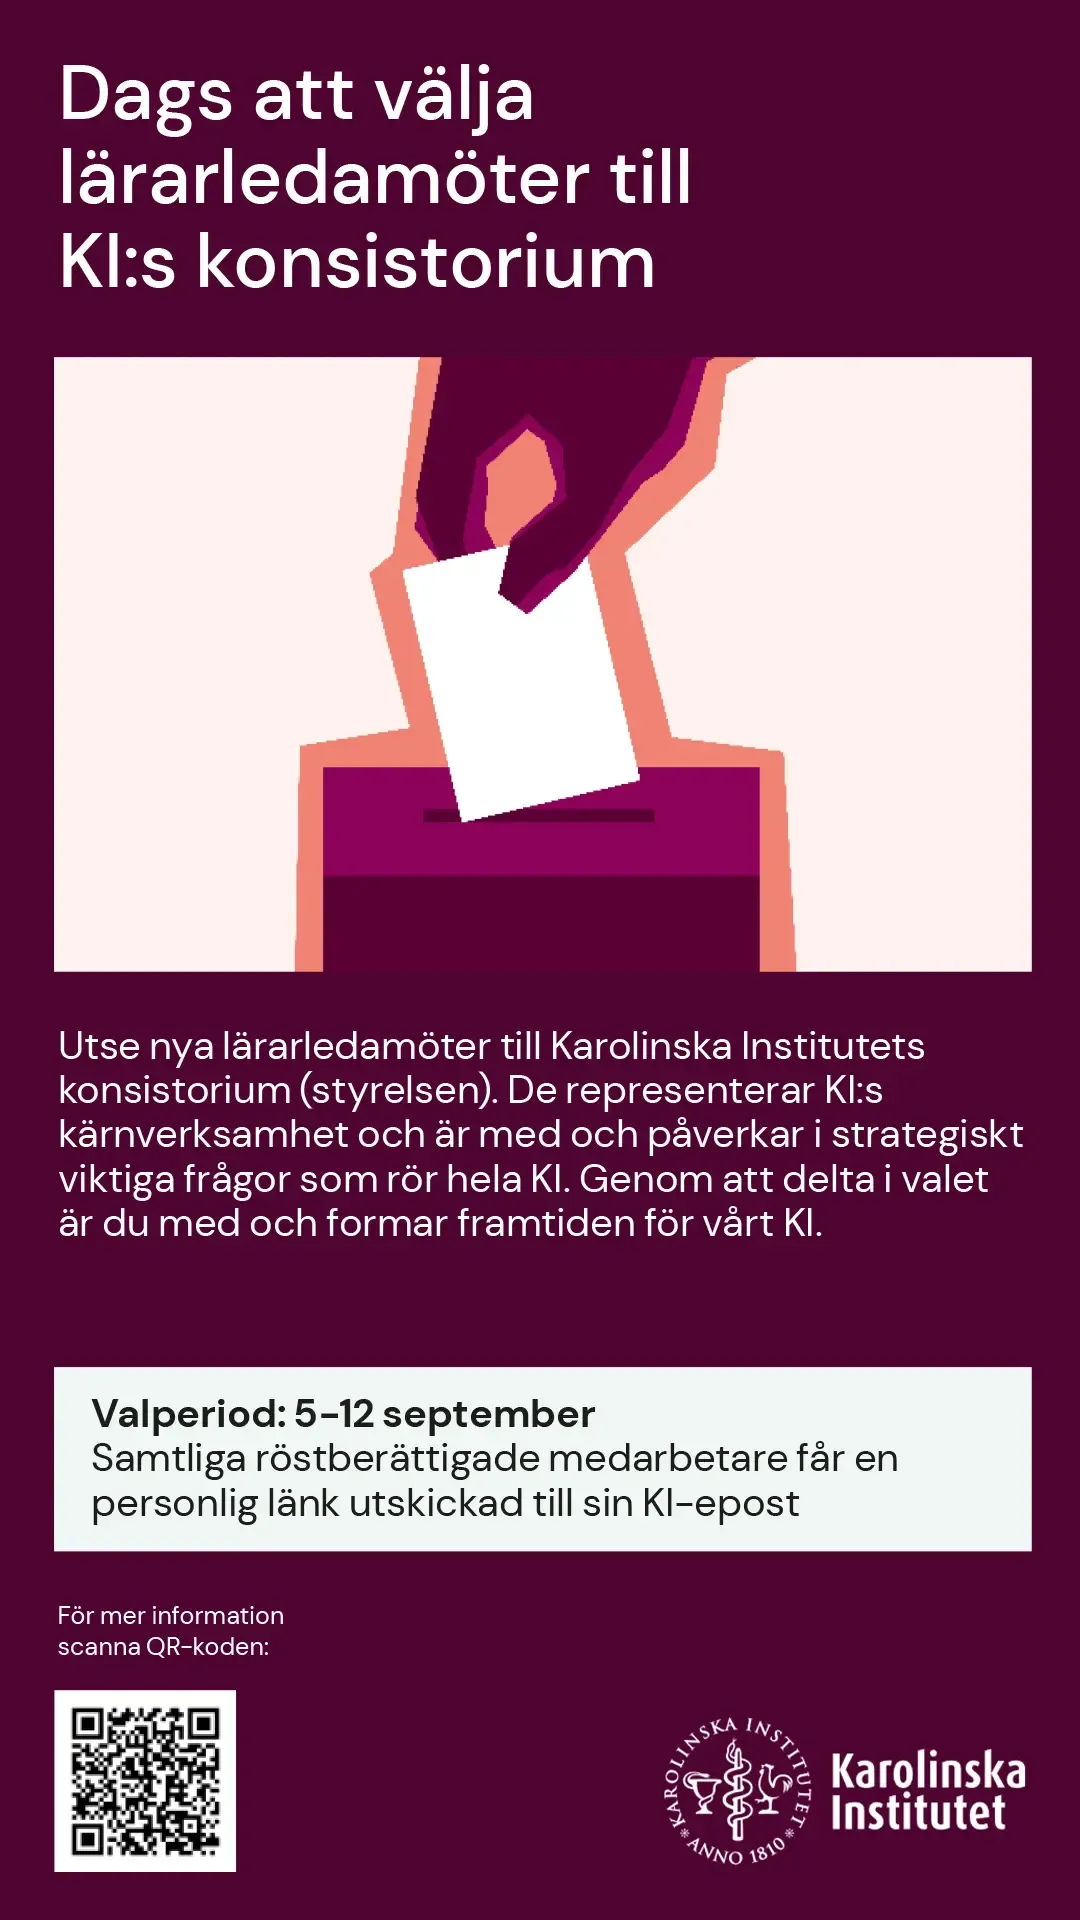
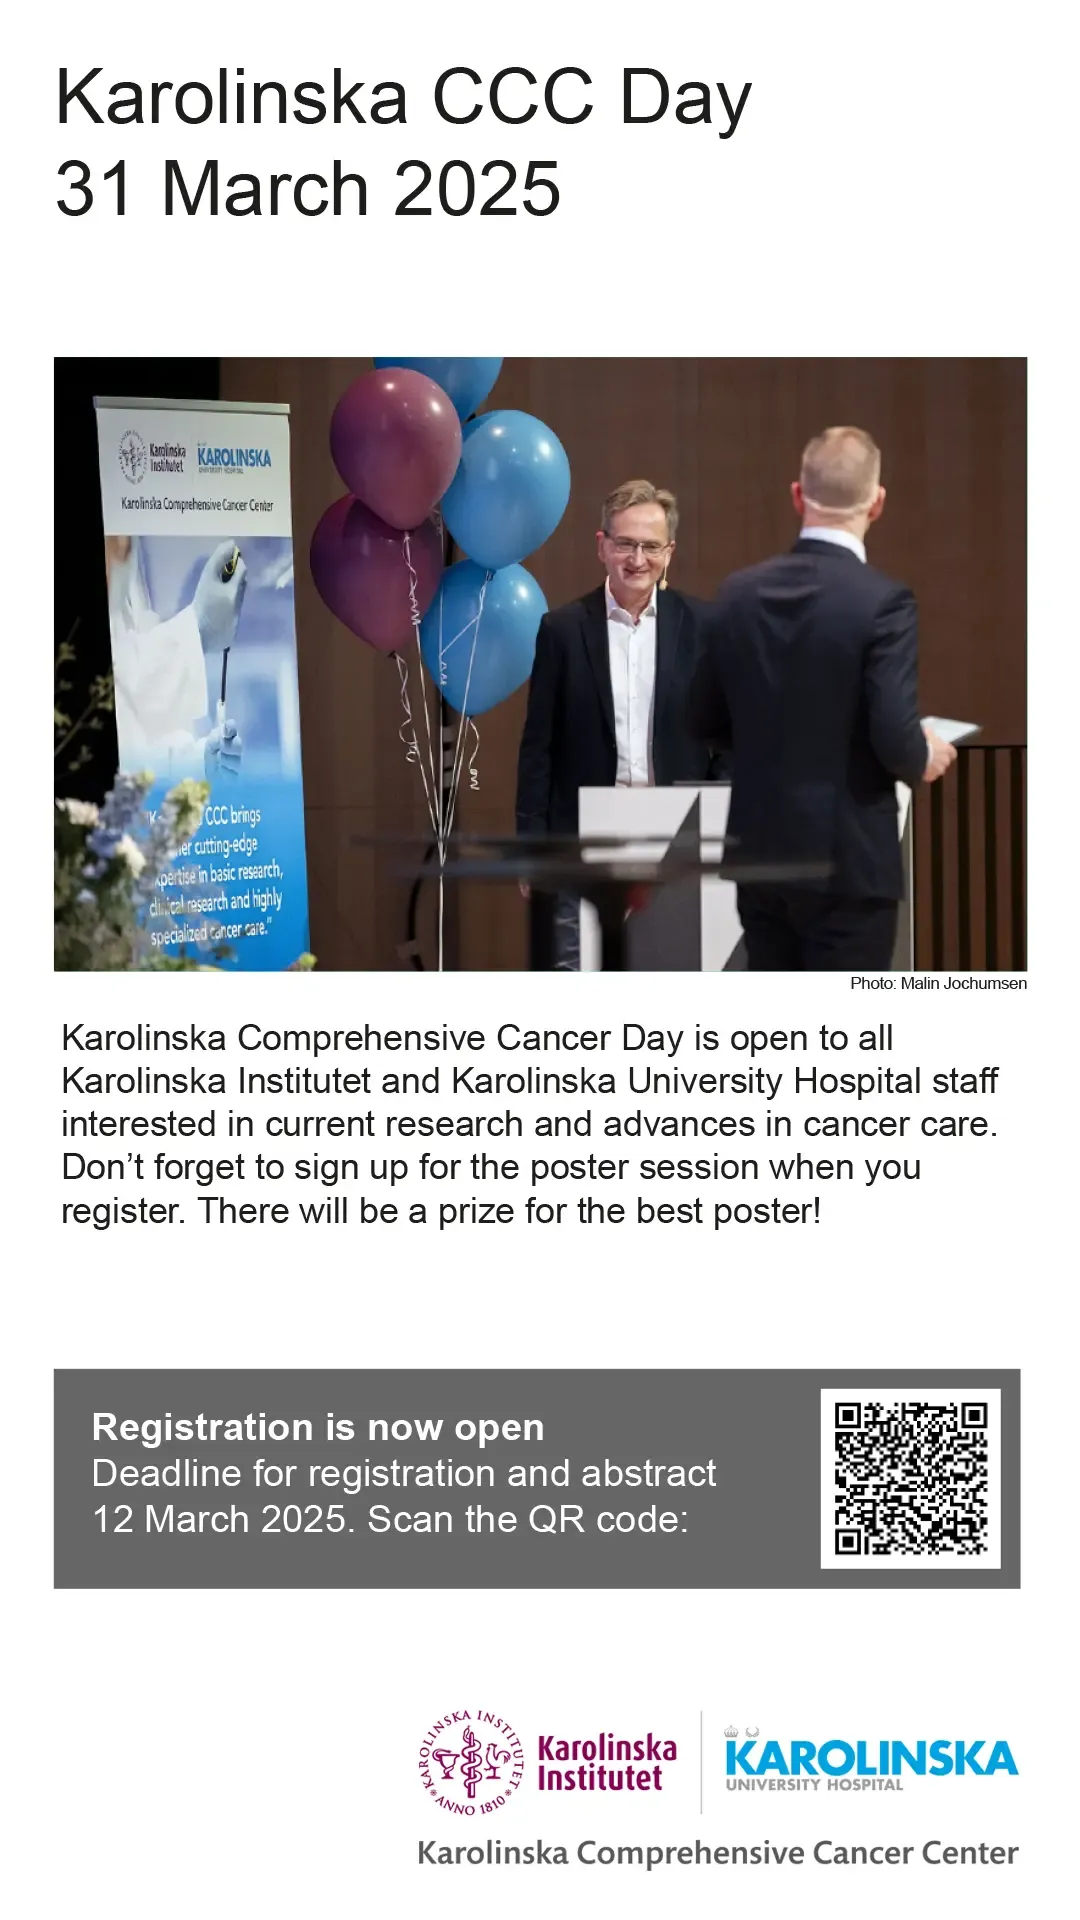
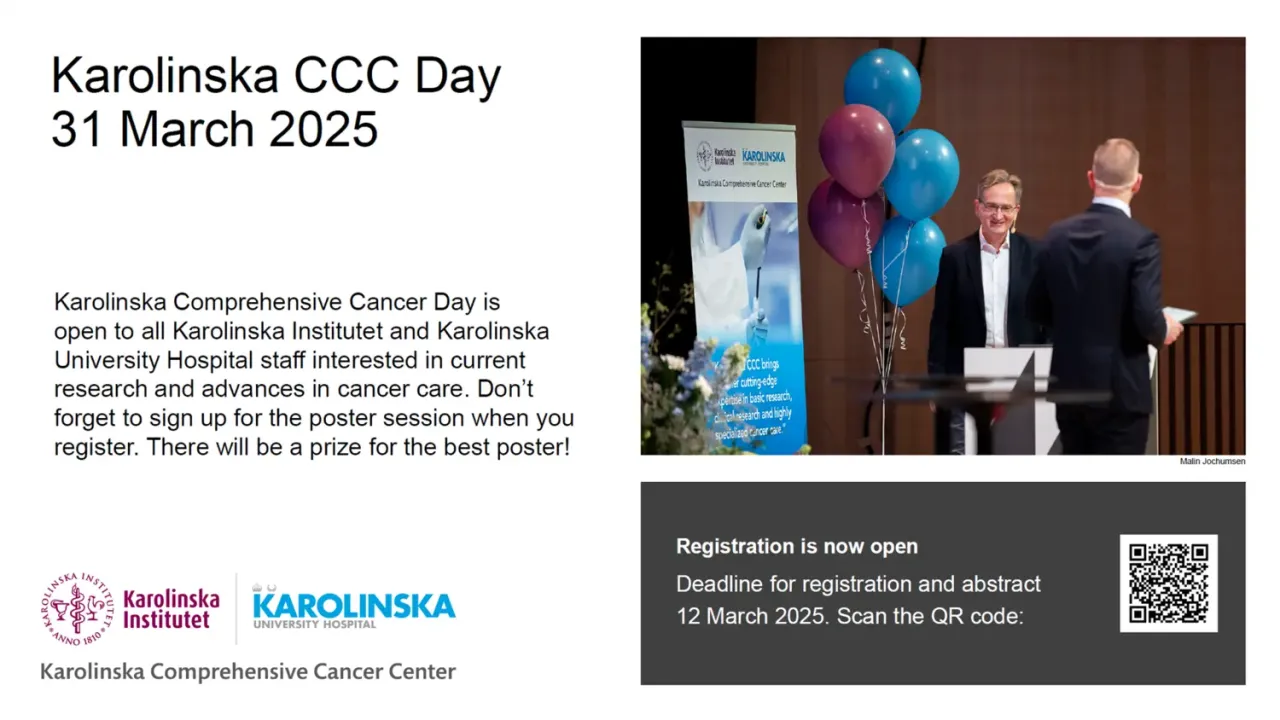
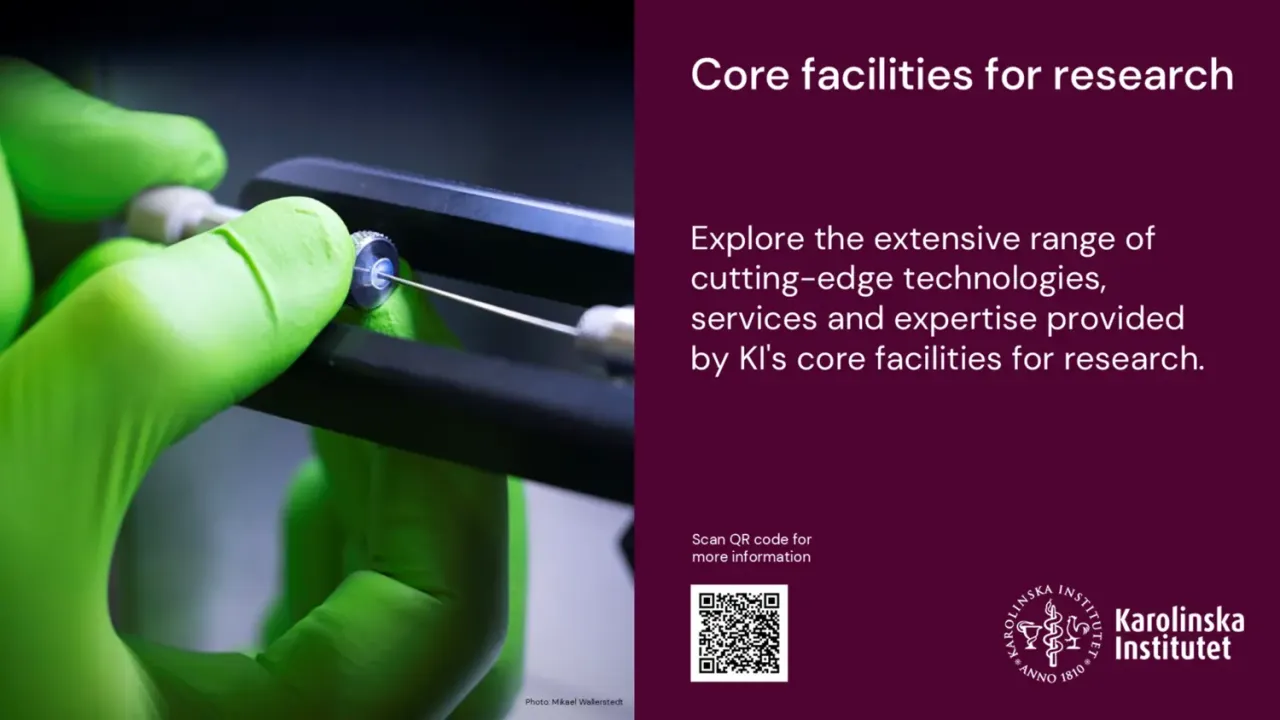
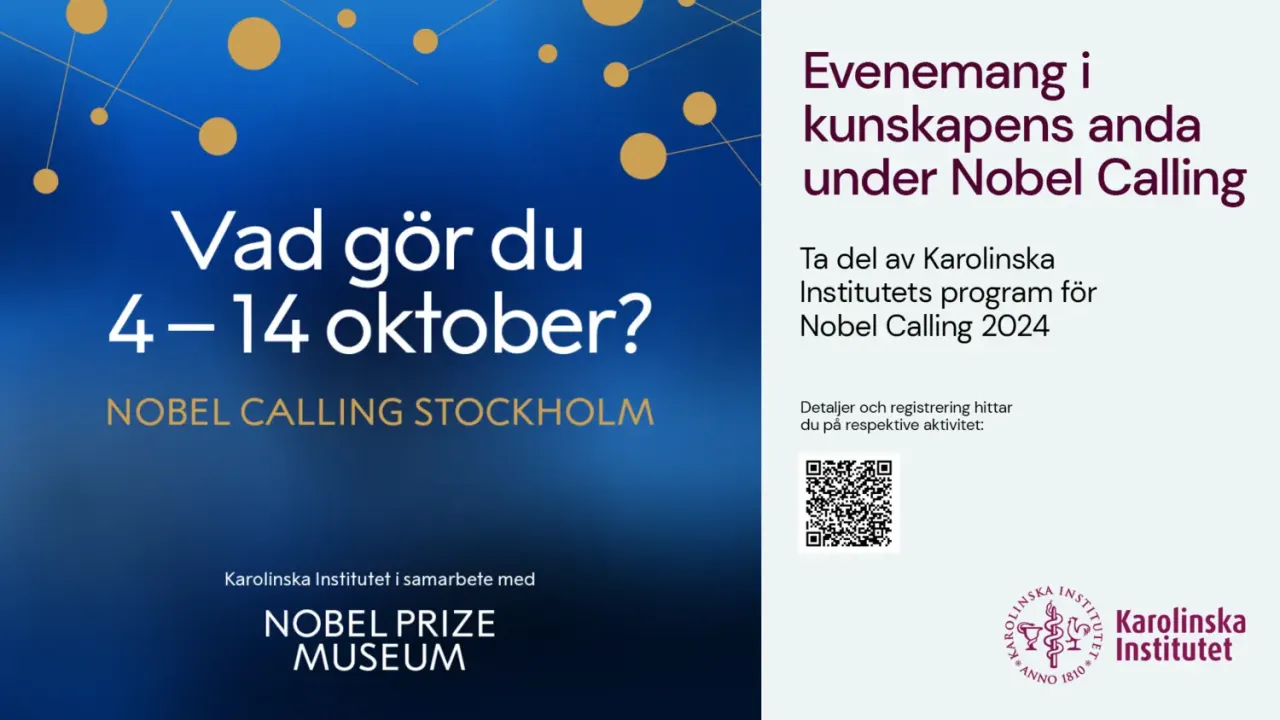
Examples of adverts