Making your own video
Have you decided to make your own video? Here we list some things that are good to think about during the process.
Before filming: make a plan
What kind of video are you making: is it a full-length film, a commercial or a social media post? Think about what you want your video to convey, who you want to convey it to and how it will be distributed. Here are a few concrete steps:

- Distil your most important message down to a single sentence.
- Write a script and consider which images and visual elements can best convey your message. You will often need to film many different scenes in order to create a dynamic video. As a rule of thumb, assume that each of your scenes may be used for between three and six seconds, apart from any interviews or infographics, which may be longer.
- Consider how long you want your video to be. Generally speaking, it pays to be concise. On social media, videos of 45–90 seconds tend to work best.
- Adapt your content, language and layout to your target group. Be clear, stay on topic and cut unnecessary facts and digressions. This bears repeating: keep it concise!
- If you are making a video post for social media, start with your most dramatic point to grab the viewer’s attention; for example, a thought-provoking question, startling assertion or moving video clip (remember: you have three seconds to grab the viewer’s attention before they scroll on).
- Decide which channels you want to publish your video on and find out which formats can be accommodated and will work best on each channel. If you are unsure, contact socialmedia@ki.se.
- If you want to screencast, read more about tools here
When filming: light, sound and setting
Once your script is ready, it’s time to get out there and start shooting. Remember: it’s important to give plenty of thought to your lighting, sound and setting.
Light
Natural light generally works best. If you are shooting indoors, try filming next to a window (the camera operator should have the light from the window behind them). Avoid yellow and blue light from light bulbs and fluorescents. If you are filming when the sun is strong, try to seek out some shade. If you have access to a lighting panel, this may prove valuable when shooting indoors in low-light conditions.
Sound
Use an external microphone when shooting an interview or presentation to camera. Attach the microphone to clothing beneath the chin and connect it to your camera. Check your sound levels. Avoid noisy or distracting background environments.
Setting
Choose an appropriate setting for interviews, preferably somewhere associated with the interviewee. Avoid locations with many distractions in the background. Try placing your subject/interviewee close to the camera with some distance to the background. This will naturally place your subject in focus and blur the background slightly, making it easy for both the camera and your audience to focus.
Don’t forget cutaways! Feel free to film relevant buildings and scenery or when the interviewee does something interesting. Also consider filming from various angles and alter between close-ups and long shots to create more dynamic scenes. If you film bystanders, you will need to obtain their consent before you use them in your video. For more information on consent, please visit our page on rules to follow when making KI videos.
When editing: be clear and concise
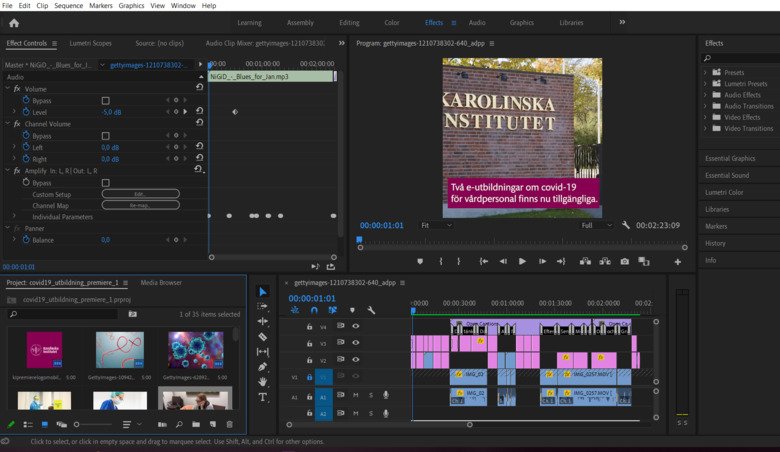
Once you’ve finished shooting your film, it’s time to check your script. Did you get all of the shots you need? If not, do you need to change the structure of your video or can you supplement your own footage with images/videos from other sources, such as photo banks?
Create a timeline with your scenes in the order you want them. Pick your best shots and edit out anything that doesn’t serve the purpose of your script. Here are a few tips for successful editing:
- Try alternating short and long scenes and switching angles and perspectives.
- Break down long interviews into concise, pithy clips and interweave them with background material. This will make your film more enjoyable to watch!
- Many editing programs allow you to add effects between clips to soften or highlight transitions. Of course, you can choose to cut between scenes with no effects. Using too many effects may distract from your message.
Feel free to use text and subtitles to reinforce your message. Text and subtitles are important both from an accessibility point of view and because many viewers watch videos with the volume turned down, especially on social media.
- It is important that your text is clearly visible against the background. Don’t use white text against a background of white clouds, for example. Many editing programs allow you to place a contrasting coloured text box beneath your text to make it easier to read. Make sure that your choice of colours and fonts follows KI’s graphic profile. For further information and to download templates, please visit our page on rules to follow when making KI videos.
- Use concise sentences and a relatively large font size that is easy to read even on a mobile phone. Interviews should also be subtitled.
- Many editing programs allow you to animate your text – for example, you might have it flying in from the side – which can be helpful in keeping up the pace of your film. Keep in mind that the viewer must have enough time to read the text before it flies out again! It’s a good idea to ask someone who is unfamiliar with the material to see if they have time to read it, or you can read it aloud to yourself.
Record dialogue. If you’re providing a commentary or voiceover for the video, try to remain calm and relaxed as if speaking to a friend. You may well find yourself holding your breath in order to get through the script. If necessary, pause to catch your breath between sentences – you can easily remove any unnatural pauses during editing. From autumn 2020, the accessibility act requires all video content to have both text and speech. Learn more about accessible film.
Done filming: Publish your video
Many editing programs, such as Adobe Premiere, require you to export your video before it can be published, in which case you will need to create a file in the correct format for your intended use. If you intend to publish online, the H. 264 format is preferred.
Videos for external use are published on KI’s YouTube channel (for further information, contact socialmedia@ki.se), while videos for internal use are published on KI Play.