Edit project properties, add/remove project users or change user permissions
To view and edit the properties of a project, add/remove project users or change project user permissions:
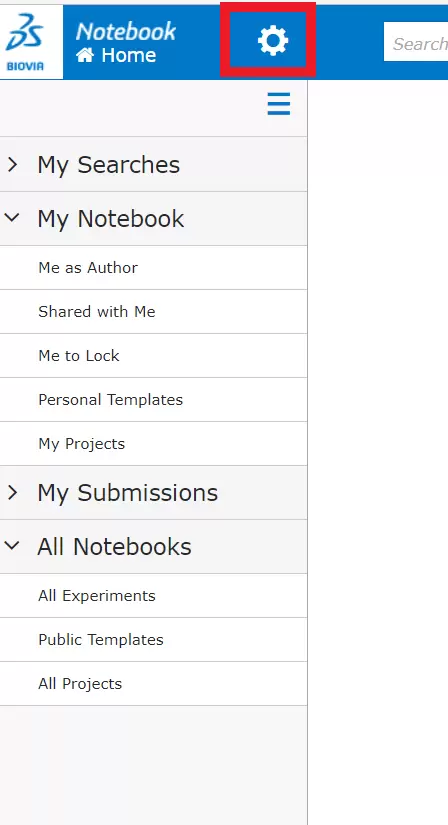
Click the Cogwheel on the ELN homepage
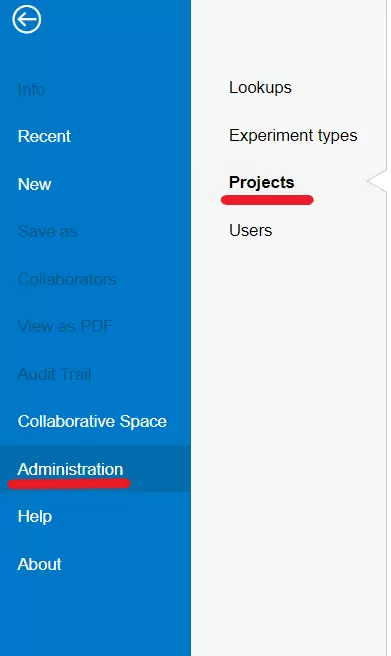
Click Administration, and from the submenu select Projects.
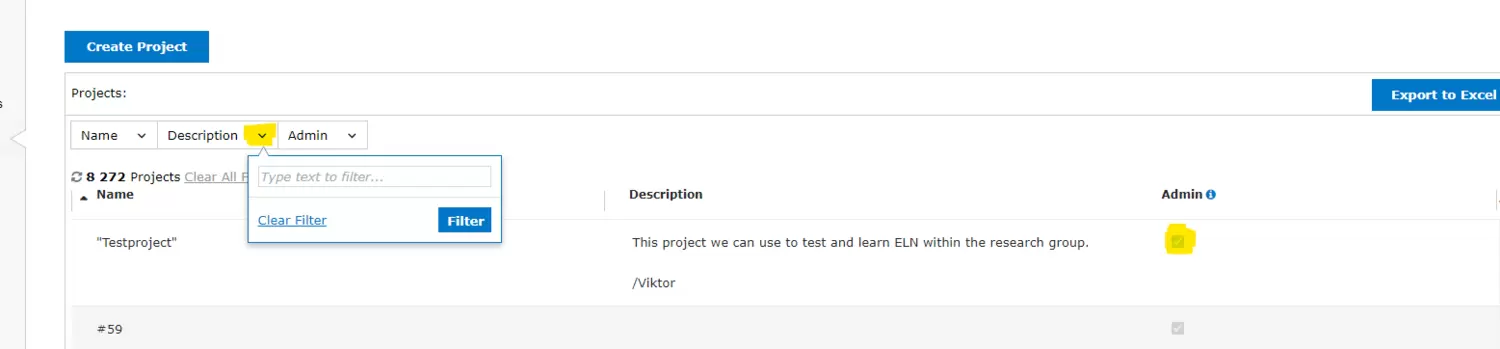
In the projects list, double-click the project that you want to open.
If you can see a project but the "Admin" box is not ticked it means that you have access to the project but can not administrate it. If you double-click a project where the "Admin" box is not ticked for you, you will not be able to open it. If you need to administrate a project for which the "Admin" box is not ticked you need to ask the superuser that has created the project to make you an "Admin for the project
To filter the list by a particular field value, click the down arrow of the field tile above the list, type the filter text, and click Filter. Filtered fields are indicated by . To clear a filter, click and select Clear filter.
Details of the project are loaded.
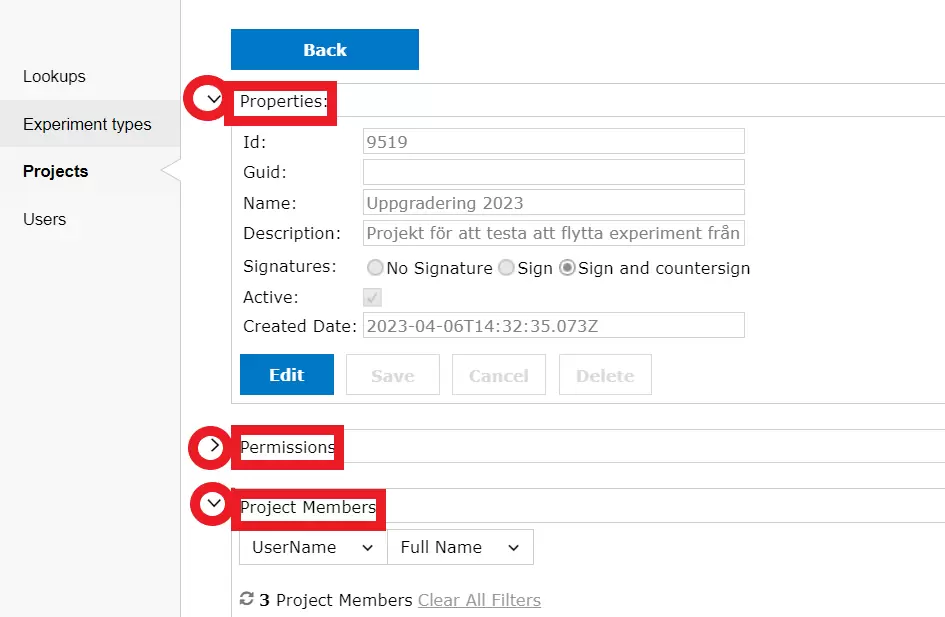
There are three panels of information:
- Properties: Here you can view or edit the general settings for the project.
- Permissions: Here you can view or edit permissions for project users and add/remove project users.
- Project Members: Here you can view a list of all users with permissions to use the project.
To expand a panel, click the arrow pointing to the right. To collapse a panel, click the arrow pointing down.
To edit the properties of the project
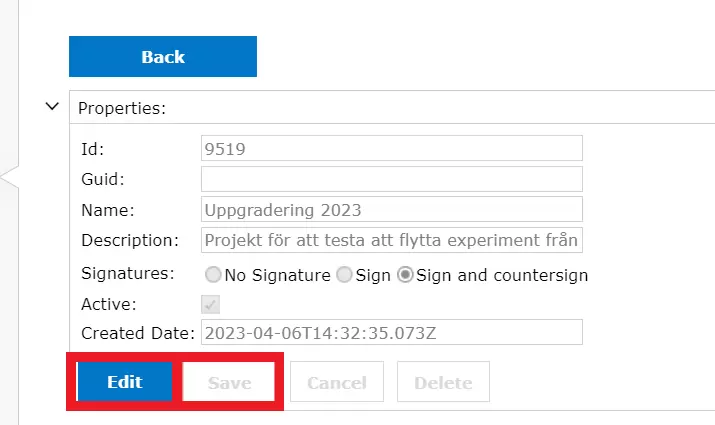
In the Properties panel, edit the project properties, as needed.
Click the Edit button, make changes and then click the Save button to save the changes.
You can edit:
- Name (name can be edited only if the project has not been used to save experiments/templates and is completely empty)
- Description (optional)
- Signatures (No Signature, Sign, or Sign and countersign).
- Active: If selected, the project is available in the list in Project sections of experiments. If not selected, the project is closed and not available to save new experiments. Assignments to deactivated projects are not removed from experiments that already have them.
You cannot edit the Id, Guid, or Created Date properties.
Change permissions of existing users
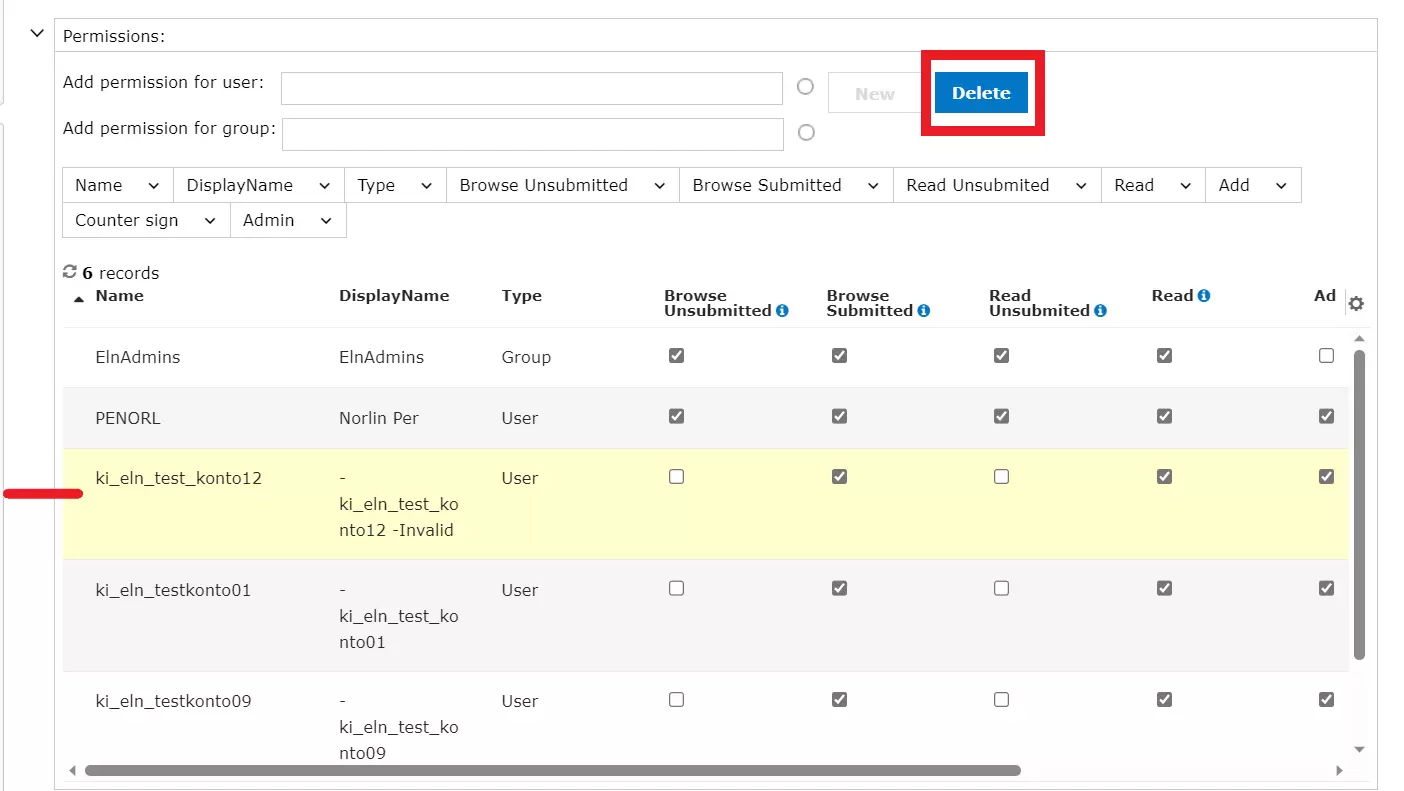
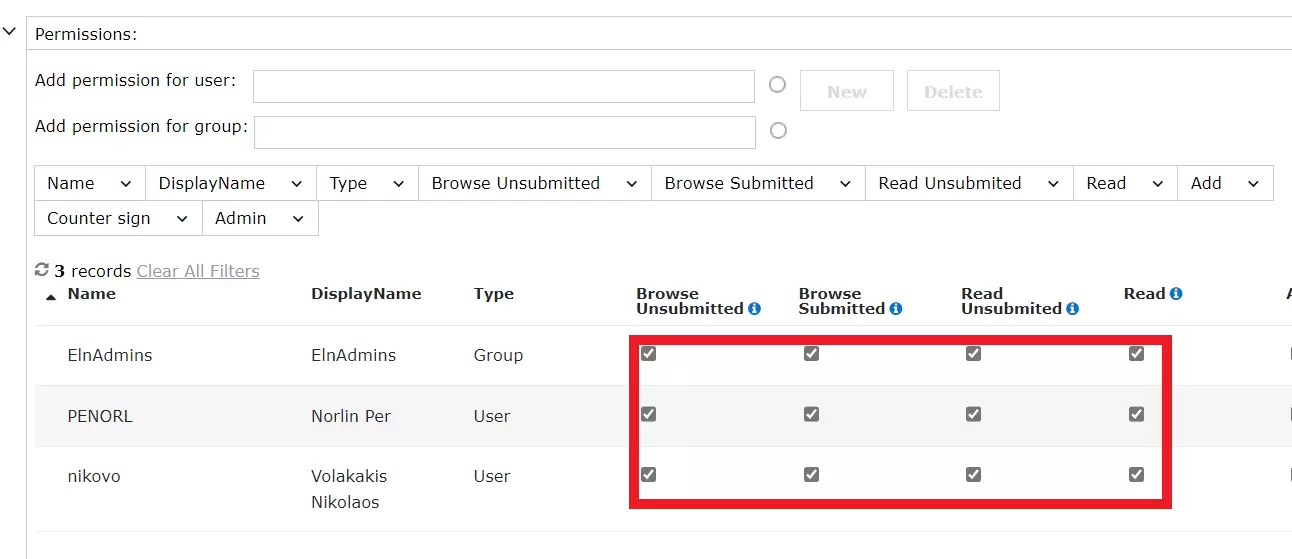
You see a list of the existing users and the project permissions they have (Browse, Read, Add, Countersign, Admin).
To change the permissions simply tick/untick the boxes accordingly.
Remember to scroll all the way to the right so you can see all the permission boxes.
| Permission | Details |
|---|---|
| Browse Unsubmitted | See unsubmitted experiments in search results |
| Browse Submitted | See submitted experiments in search results |
| Read Unsubmitted | Read unsubmitted experiments |
| Read | Read submitted experiments |
| Add | Add experiments to project |
| Counter sign | Countersign experiments |
| Admin | Administer the project |
Give project access to individual users
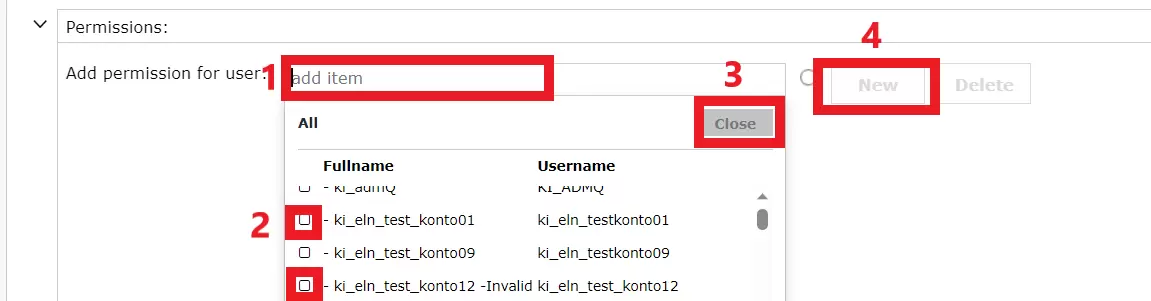
To add individual users to a project:
- Select the radio button next to the Add permission for user box.
- Click in the box, and select users from the list.
- To filter the list, typing a sequence of characters
- You can select multiple users by clicking on the box next to their name
- Click Close to close the list
- Click New
- Click on the boxes to give the permissions (Add, Browse, Read, Admin).
The following users are available for you to add to projects:
- Users for which you have read or administrator access
- Users for which your groups have read or administrator access
- Users in groups for which you have read or administrator access
- Users in groups for which your groups have read or administrator access
- Users who have direct access to same projects as you
- Users in groups that have access to same projects as you
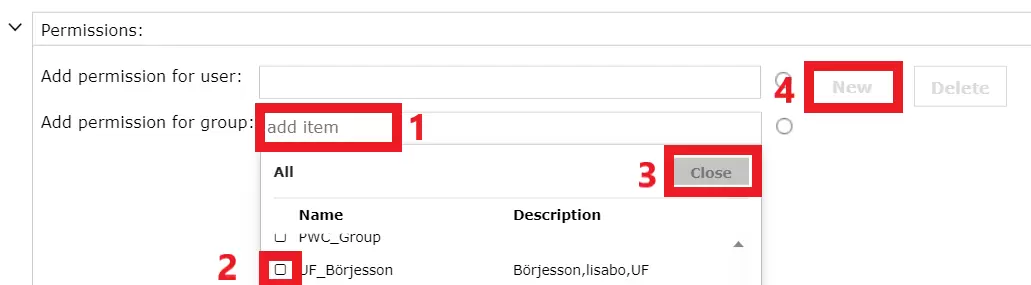
Give project access to group(s)
To add the whole group or more groups to the project:
- Select the radio button next to the Add permission for group box.
- Click in the box, and select group(s) from the list.
- To filter the list, typing a sequence of characters
- You can select multiple groups by clicking on the box next to their name
- Click Close to close the list
- Click New
- Click on the boxes to give the permissions (Add, Browse, Read, Admin).
The following groups are available for you to add to projects:
- Groups for which you have read or administrator access
- Groups for which your groups (that is, the groups to which you belong) have read or administrator access
Remove users or groups
To remove users or groups from a project;
- Select the users or the groups from the list.
- The selected users/groups get highlighted in yellow
- You can select multiple users/groups at the same time
- Click on Delete